
How to Set Up an Azure Virtual Network with NSG: A Step-by-Step Guide
As an Azure expert, I’ve seen many teams struggle with building secure networks in the cloud. Creating a Virtual Network with the right security rules is a critical first step to protecting your workloads.
In this guide, I’ll show you exactly how to set up an Azure Virtual Network and secure it using Network Security Groups (NSGs). The steps are clear and easy to follow, even if you’re just getting started.
Understanding the Basics
Before you create anything in Azure, it’s important to know how each part works together. These concepts form the foundation of a secure and well-organized network.
Virtual Network (VNet):
A Virtual Network in Azure is your private, isolated network space. It acts like your own data center in the cloud. You define address ranges, create subnets, and decide how resources talk to each other. VNets also let you connect securely to on-premises networks through VPNs or ExpressRoute.
Network Security Group (NSG):
An NSG is a filter that controls traffic moving in and out of your resources. It uses rules to decide which connections are allowed or denied, based on factors like source IP, destination port, and protocol. For example, you can allow remote desktop traffic only from your office IP range and block all other inbound connections. NSGs are a core security layer in any Azure environment.
Key Elements:
- Subnets:
Subnets are sections inside your VNet that divide the address space into smaller parts. You place resources like virtual machines into subnets to group them by function or security level. Each subnet can have its own NSG attached to control traffic. - Security Rules:
Security rules define what traffic is allowed or denied. Each rule has a priority, action (allow or deny), protocol, port range, and source/destination. Azure processes the rules in order of priority, so the first match determines what happens to the traffic. - Resource Groups:
A resource group is a logical container that holds related Azure resources. It helps you manage and monitor everything as a single unit. When you delete a resource group, all resources inside it are also removed, which makes cleanup simple.
Prerequisites
Before you begin, confirm you have:
- An active Azure subscription.
- Access to the Azure Portal.
- A clear naming plan for your resources.
Creating a Resource Group
Resource groups help you manage related resources together.
Steps:
- Sign in to Azure Portal.
- Select Resource groups from the left menu.
- Click + Create.

- Choose your subscription.
- Enter a resource group name (e.g., UmeshNSG).
- Select a region close to your users.
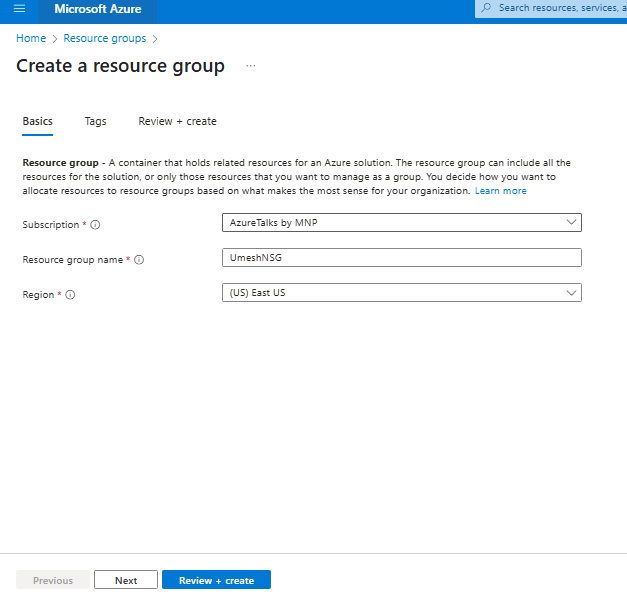
- Click Review + create, then Create.
Deploying an Azure Virtual Network
A Virtual Network provides the base for all your workloads.
Steps:
- In the Azure Portal, search for Virtual networks.
- Click + Create.

- Select your resource group.
- Name your VNet (e.g., UmeshNet).
- Use the same region as your resource group.

- Under IP Addresses, set your address space (for example, 10.0.0.0/16).
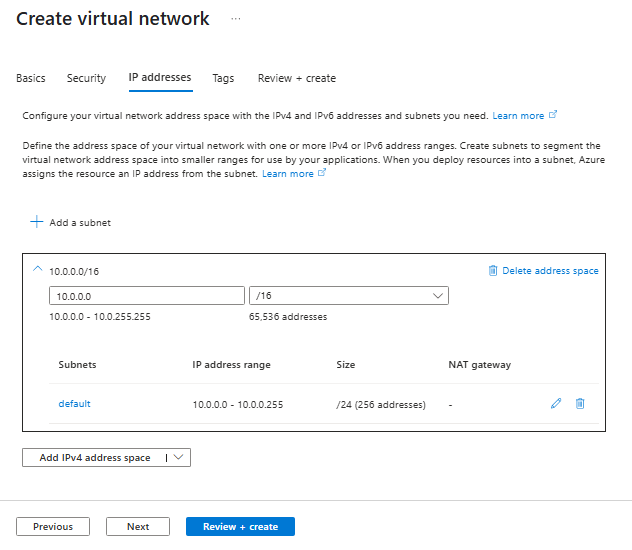
- Add a default subnet (10.0.0.0/24).
- Click Review + create, then Create.

Tip: Make sure your address space does not overlap with other networks you plan to connect later.
Creating Subnets
Subnets divide your VNet into smaller parts, so you can apply different rules or isolate workloads.
Steps:
- Open your VNet in the portal.
- Click Subnets.
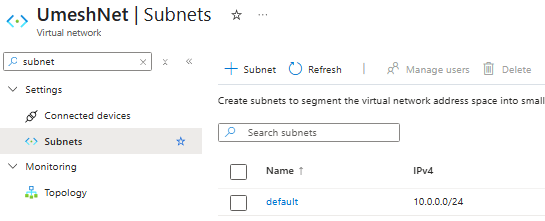
- Click “+ Subnet”.
- Give the subnet a name (e.g., AppSubnet).
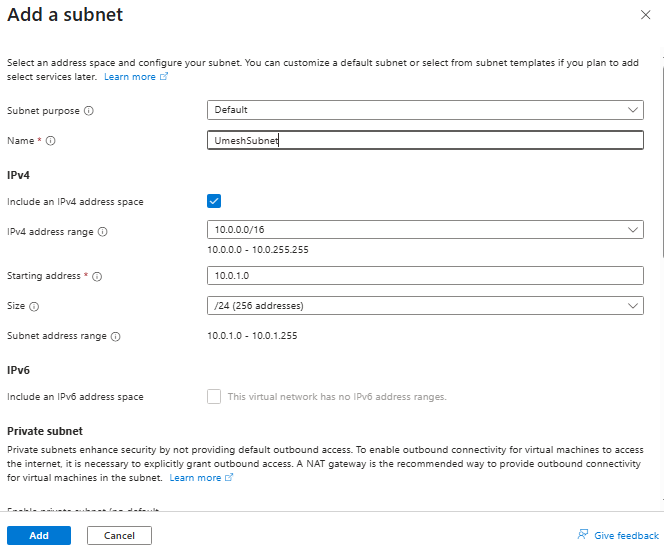
- Enter the address range (e.g., 10.0.1.0/24).
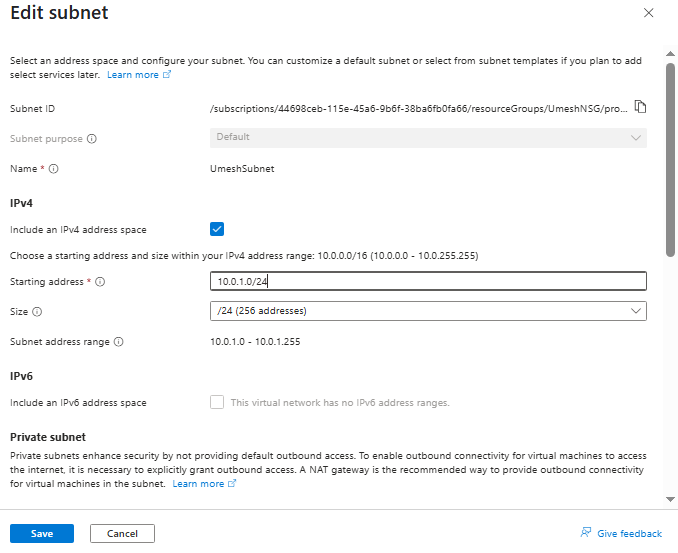
- Click Add.
Create as many subnets as needed for your architecture.
Setting Up Network Security Groups
An NSG controls the allowed traffic to your resources.
Steps:
- In the portal, search Network security groups.

- Click + Create.
- Select your resource group.
- Name your NSG (e.g., UmeshSG).
- Select the region.
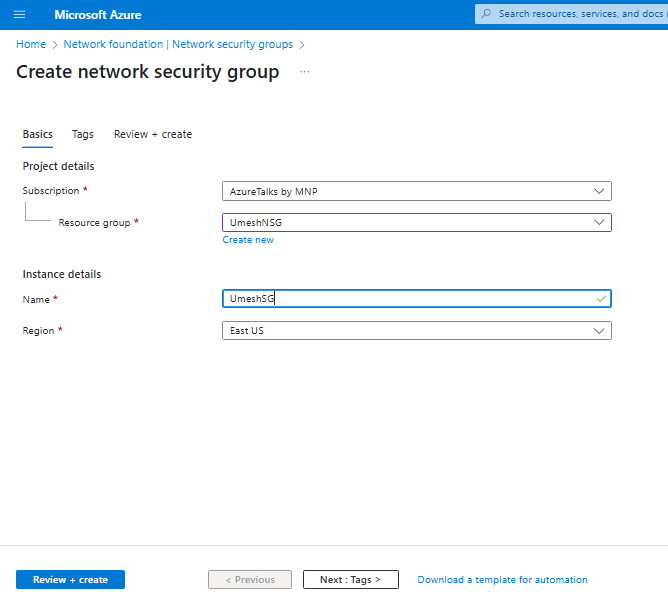
- Click Review + create, then Create.
Creating Security Rules
Security rules define how traffic flows.
Example: Allow SSH (port 22) and deny everything else
Steps:
- Open your NSG.
- In the left menu, look under Settings.
- Click Inbound security rules.
- Here you will see any existing rules.

- Click + Add at the top.
- A panel will slide out on the right side.
- Fill out:
- Source: Any
- Source port ranges: *
- Destination: Any
- Destination port ranges: 22
- Protocol: TCP
- Action: Allow
- Priority: 100
- Name: Allow-SSH
- Click Add.
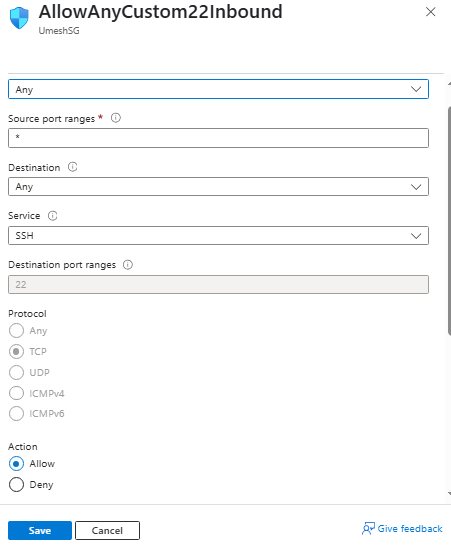
Note:
Lower priority numbers are processed first.
Associating NSGs with Subnets or NICs
You must attach the NSG to apply your rules.
Steps:
- Go to All resources.
- Find and select your NSG.
- In the left menu under Settings, click Subnets.
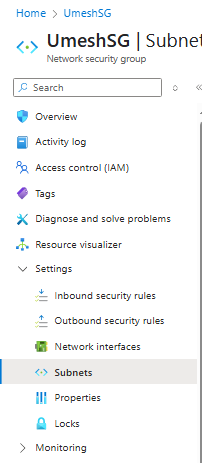
- Click Associate.
- Choose your VNet and subnet.

- Click OK.
If needed, you can also attach an NSG to a network interface of a VM.
Verifying and Testing the Configuration
Validation ensures everything works as planned.
Steps:
- In your NSG, check the Effective security rules.
- Deploy a VM in your subnet.
- Test connections (e.g., SSH into the VM).
- Confirm traffic is allowed or blocked as expected.
Monitoring and Maintaining NSGs
Over time, your needs may change.
Best Practices:
- Enable logging and diagnostics to track traffic.
- Use Azure Monitor to review metrics and alerts.
- Review rules regularly and remove any you don’t need.
Conclusion
As someone who helps teams secure their Azure environments, I know that clear steps and careful planning make all the difference. Now you have the knowledge to build a Virtual Network and protect it with NSGs. Take time to test your setup and adjust your rules as your workloads grow. If you have any quarry and want any assistance, you can contact me on LinkedIn.